June does not sync or import issues from your Jira instance. Instead, June acts as an intelligent agent that can be triggered to work on specific tickets.
What you’ll accomplish
- Create a service account in Atlassian Admin
- Generate OAuth 2.0 credentials for secure API access
- Configure the June integration
- Set up webhooks so June can respond to ticket events
- Learn how to trigger June to act on tickets
Prerequisites
Before starting the integration, ensure you have:- Atlassian organization admin access
- Access to create service accounts in Atlassian Admin
- June organization admin permissions
- Understanding of which Jira projects you want to integrate
How June Works with Jira
Triggering June
There are two ways to have June act on a Jira ticket:Mention June in a Comment
Tag the June service account in a comment (e.g.,
@June AI please triage this ticket). June will read the ticket and respond.Assign a Ticket to June
Assign any ticket to the June service account. June will pick it up and take action based on your configured workflows.
Available Actions
Once triggered, June can perform the following actions on Jira tickets:Example Use Cases
Triage incoming requests
Triage incoming requests
Assign tickets to June for automatic classification, priority assessment, and routing to the appropriate team or individual.
Answer common questions
Answer common questions
Mention June in a comment to get AI-assisted responses based on your knowledge base and asset data.
Update ticket status
Update ticket status
June can transition tickets through your workflow stages based on resolution criteria or time-based rules.
Create follow-up tickets
Create follow-up tickets
June can automatically create related tickets in other projects when specific conditions are met.
Setup Process
Step 1: Create a Service Account
1
Access Atlassian Admin
- Go to Atlassian Admin
- Log in with your organization admin credentials
- Navigate to Directory → Service accounts
2
Create Service Account
- Click Create service account
- Enter a name:
June AIand an optional description. - Select the app roles you want to grant to the service account.
- Jira Service Management: Grant the
User(agent)role to the service account. - Jira Software: Grant the
Userrole to the service account.
- Jira Service Management: Grant the
- Click Save to create the service account
Step 2: Create OAuth 2.0 Credentials
1
Access Service Account Settings
- Select the service account you just created (
june-integration) - Click Create credentials
- Select OAuth 2.0, then click Next
- Set a name for the credentials:
june-service-account-credentials.
2
Configure Required Scopes
Select the following scopes based on your integration needs:Required scopes (all integrations):
read:jira-work- Read issues and projects datawrite:jira-work- Create/edit/delete issues, post comments as user, create worklogs.read:jira-user- View user information (email, username, avatar)
3
Generate Credentials
- Click Create to generate the credentials
- Immediately copy the
client_idandclient_secret - Store these credentials securely. We will need these credentials in the next step to configure the June integration.
Step 3: Add Service Account to Projects
The service account needs access to each Jira project you want to integrate with June.1
Navigate to Project Settings
- Go to your Jira instance
- Open the project you want to integrate
- Navigate to Project settings → People (or Access depending on your Jira version)
2
Add Service Account
- Click Add people
- Search for the service account email or username from the previous step.
- Assign an appropriate role:
- Service Desk Team for Jira Service Management projects
- Member for Jira Software projects
- Click Add to confirm
3
Repeat for Additional Projects
Repeat the above steps for each project you want to integrate with June.
Step 4: Configure June Integration
1
Access June Integrations
- Log into June
- Navigate to Settings → Integrations
- Select Jira from the available integrations
2
Enter Credentials
Provide the following information:
- Client ID: The
client_idfrom Step 2 - Client Secret: The
client_secretfrom Step 2
3
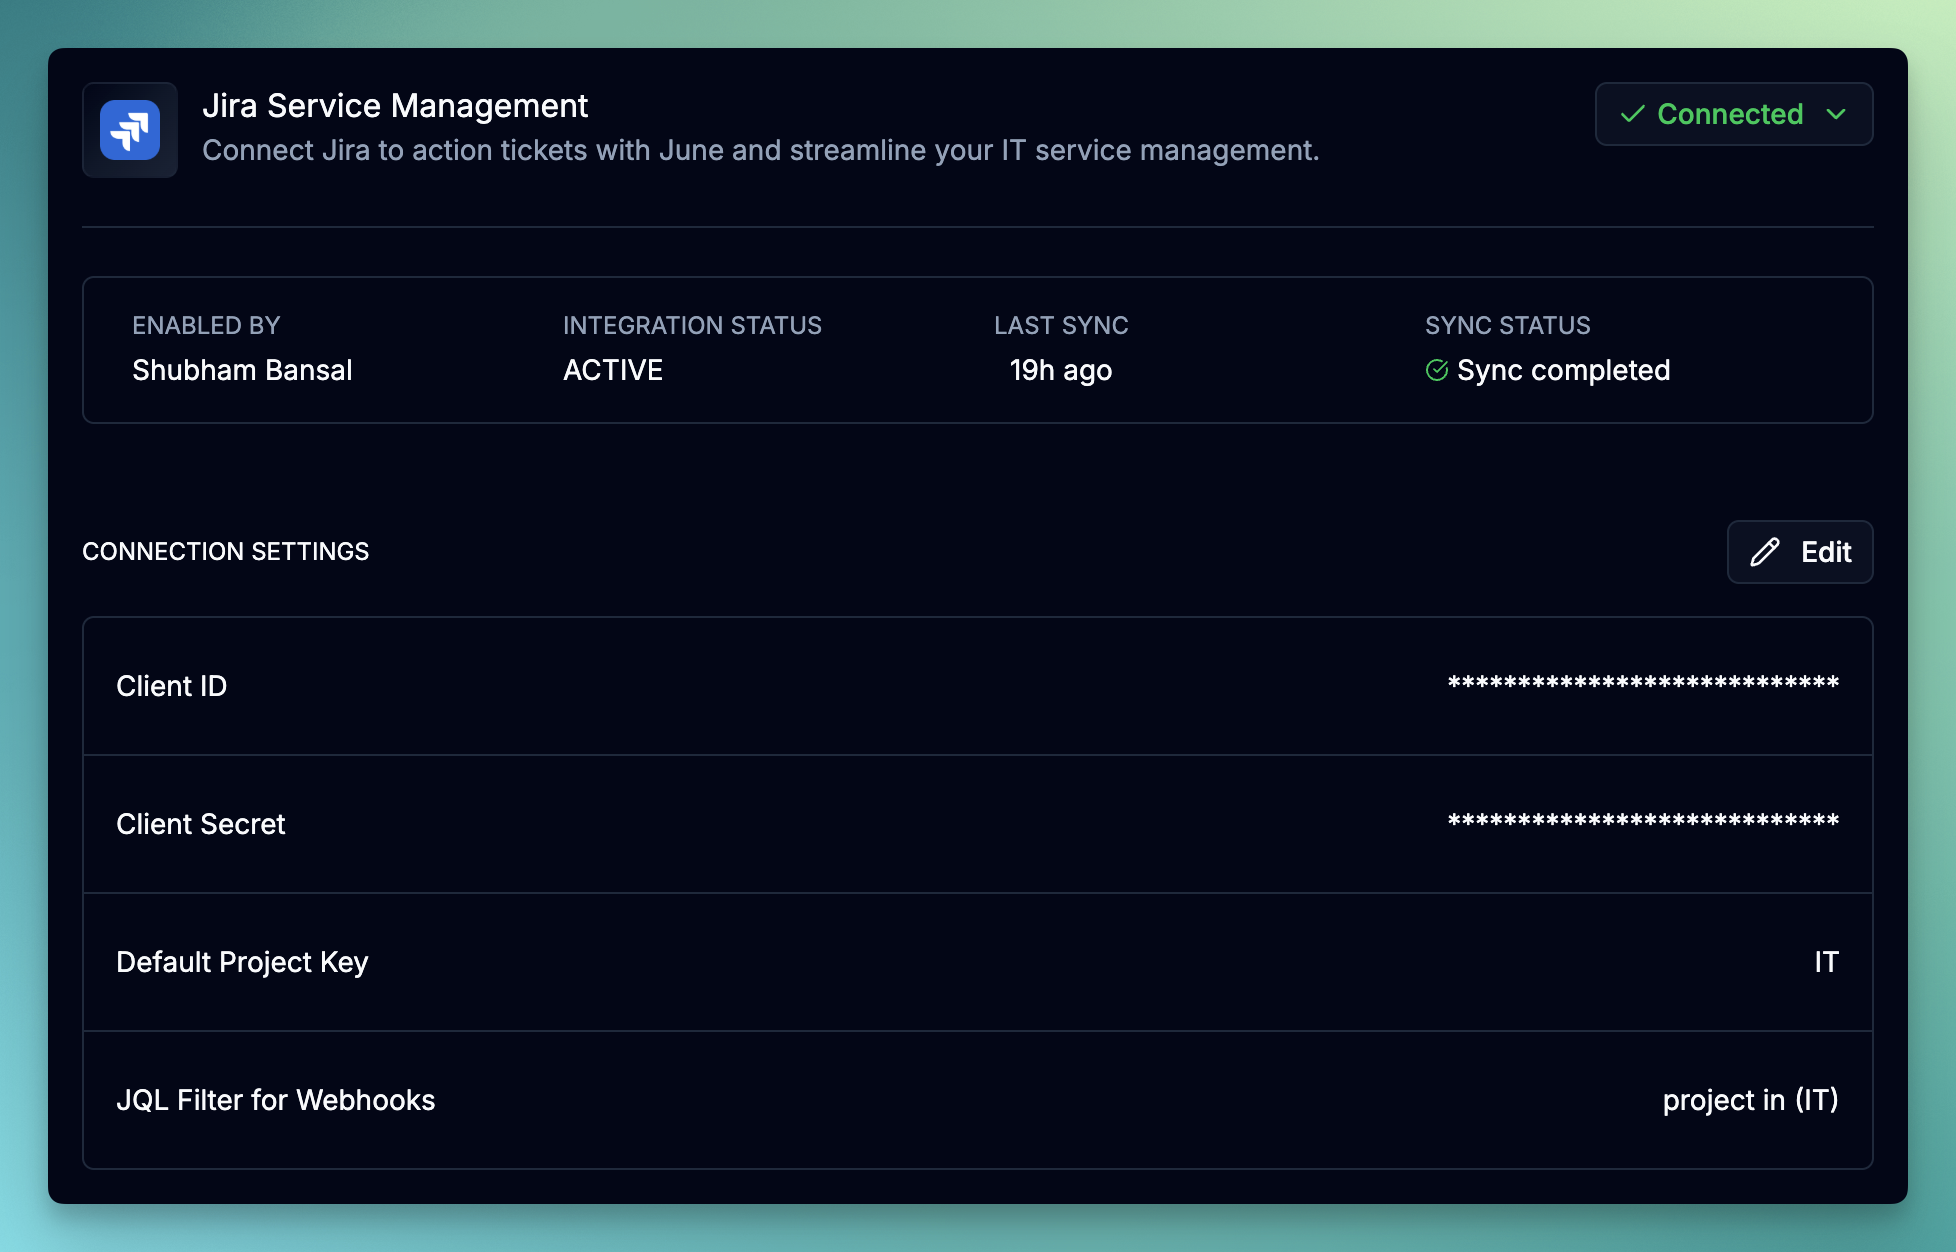
Connect and Select Instance
- Click Connect
- Verify the connection status shows as Active
- Once connected, you can set the default project key where June will create new tickets. This is optional and can be changed later.
4
Test the Connection
- Click Test Connection to verify the setup
- June will attempt to connect and retrieve sample data
- Resolve any authentication issues before proceeding
5
Test ticket creation
- Click on the Create test ticket button to test the ticket creation.
- A ticket will be created in the default project you specified above.
- Once the ticket is created, you can validate the ticket was created by the service account user.
- Feel free to close or delete the ticket after testing.
Webhook Configuration
Webhooks notify June when tickets are created, updated, or commented on—allowing June to respond in real-time when triggered by mentions or assignments.Step 1: Get Your Webhook URL
1
Access Webhook Settings
- In June, go to Settings → Integrations → Jira
- Under the Webhooks section, click Register
- Copy the generated Webhook URL
Step 2: Create Webhook in Jira
1
Access Jira System Settings
- Go to your Jira instance
- Click the Settings gear icon at the top right corner of the page.
- Navigate to System → Webhooks
2
Create New Webhook
- Click Create a webhook
- Configure the following settings:
- Name:
June Integration - URL: Paste the webhook URL from Step 1
- Secret: Generate a secure secret and save it for the next step.
- Name:
3
Select Webhook Events
Choose which events should trigger the webhook:
Issue created- When new issues are createdIssue updated- When issues are modifiedIssue deleted- When issues are deletedComment created- When comments are addedComment updated- When comments are editedComment deleted- When comments are deleted
4
Save Webhook
Click Create to save the webhook configuration.
Step 3: Save Webhook Secret in June
1
Complete Webhook Setup
- Return to June’s Jira integration settings
- Enter the Webhook Secret you generated in Jira
- Click Save
- Your webhook is now active and will receive real-time updates
Test by creating a ticket in Jira and mentioning the June service account in a comment. June should respond within a few moments.
API Scopes Reference
Troubleshooting
Common Authentication Issues
No accessible Jira instances found
No accessible Jira instances found
Symptoms: Error message stating no Jira instances are accessibleSolutions:
- Ensure the service account has been granted access to at least one Jira site
- Verify the OAuth scopes include
read:jira-work - Check that the service account is active and not disabled
- Re-authenticate the integration in June
404 errors when fetching issues
404 errors when fetching issues
Symptoms: Issues not appearing or 404 errors in sync logsSolutions:
- The service account doesn’t have access to the project
- Add the service account to the project with at least “Browse Projects” permission
- Verify the project key is correct in any JQL filters
- Check if the project has been archived or deleted
Authentication errors
Authentication errors
Symptoms: “Invalid credentials” or “Authentication failed” errorsSolutions:
- Client credentials may have been revoked in Atlassian Admin
- Re-create OAuth 2.0 credentials and update in June
- Verify the client ID and secret were copied correctly
- Check if the service account has been disabled
Webhook Issues
Webhook events not arriving
Webhook events not arriving
Possible Causes:
- Webhook URL is incorrect in Jira
- Webhook is paused or disabled
- Webhook secret mismatch between Jira and June
- JQL filter is excluding your issues
- Verify the webhook URL is correct in Jira settings
- Ensure the webhook is enabled (not paused)
- Confirm the webhook secret matches in both Jira and June
- Test without JQL filters to verify basic functionality
- Check Jira’s webhook logs for delivery errors
Duplicate events received
Duplicate events received
Possible Causes:
- Multiple webhooks configured for the same events
- Webhook retry mechanism triggering duplicates
- Review and remove duplicate webhook configurations
- June automatically deduplicates events based on issue ID and timestamp
June Not Responding
June doesn't respond when mentioned
June doesn't respond when mentioned
Possible Causes:
- Webhook not configured or not receiving events
- Service account not added to the project
- Incorrect mention format (wrong username)
- Verify webhook is configured and enabled in Jira
- Confirm the service account has access to the project
- Check you’re using the correct service account username in mentions
- Review webhook delivery logs in Jira for errors
June doesn't act on assigned tickets
June doesn't act on assigned tickets
Possible Causes:
- Webhook events for assignment changes not enabled
- Service account cannot be assigned tickets in the project
- Workflow restrictions preventing assignment
- Ensure “Issue updated” webhook event is enabled
- Verify the service account has the correct role to be assigned tickets
- Check project workflow rules for assignment restrictions
June's actions fail
June's actions fail
Possible Causes:
- Insufficient permissions for the action (e.g., transitioning tickets)
- Workflow restrictions preventing the action
- Required fields missing for the action
- Review service account permissions in the project
- Check project workflow for transition requirements
- Ensure any required custom fields are configured
Security Best Practices
Credential Management
- Token Security: OAuth 2.0 access tokens expire after 60 minutes and are automatically refreshed by June
- Secret Storage: Webhook secrets are encrypted at rest in June’s secure storage
- Unique Secrets: Use a unique webhook secret for each integration
- Regular Rotation: Periodically rotate OAuth credentials (quarterly recommended)
Access Control
- Least Privilege: Grant the service account only the permissions needed for integration
- Project Scope: Limit service account access to only the projects you need to integrate
- Audit Logging: Regularly review service account activity in Atlassian Admin
Incident Response
- If you suspect a webhook URL has been compromised, regenerate it immediately in June
- If credentials may be compromised, revoke them in Atlassian Admin and create new ones
- Review Jira audit logs for any unauthorized access
Next Steps
Once your Jira integration is configured:Configure Workflows
Set up automated workflows that June can trigger based on ticket content
Asset Discovery
Connect your asset inventory so June can reference device data when handling tickets
AI Insights
Learn how June uses AI to triage and respond to tickets intelligently
Identity Providers
Connect your IdP so June can identify users and their assigned devices
Support Resources
Need help with your Jira integration?- Atlassian Documentation: Review Atlassian’s OAuth 2.0 documentation for additional details
- June Support: Contact support for integration-specific assistance
Jira integration typically establishes connection within minutes. Once webhooks are configured, June will respond to mentions and assignments in real-time.