What you’ll accomplish
- Create an Okta OAuth 2.0 application
- Assign admin roles to the app
- Provide June with your client ID and tenant URL
- Enable automated identity data ingestion
Capabilities
Once connected, June provides the following capabilities for Okta:Data Synchronization
Security Actions
Group Management
Prerequisites
Before starting the integration, ensure you have:- Okta Super Admin access
- Access to create OAuth 2.0 applications in Okta
Okta OAuth 2.0 Application setup
Step 1: Add June Application in Okta
1
Access Integrations
- Log into June
- Navigate to Integrations page
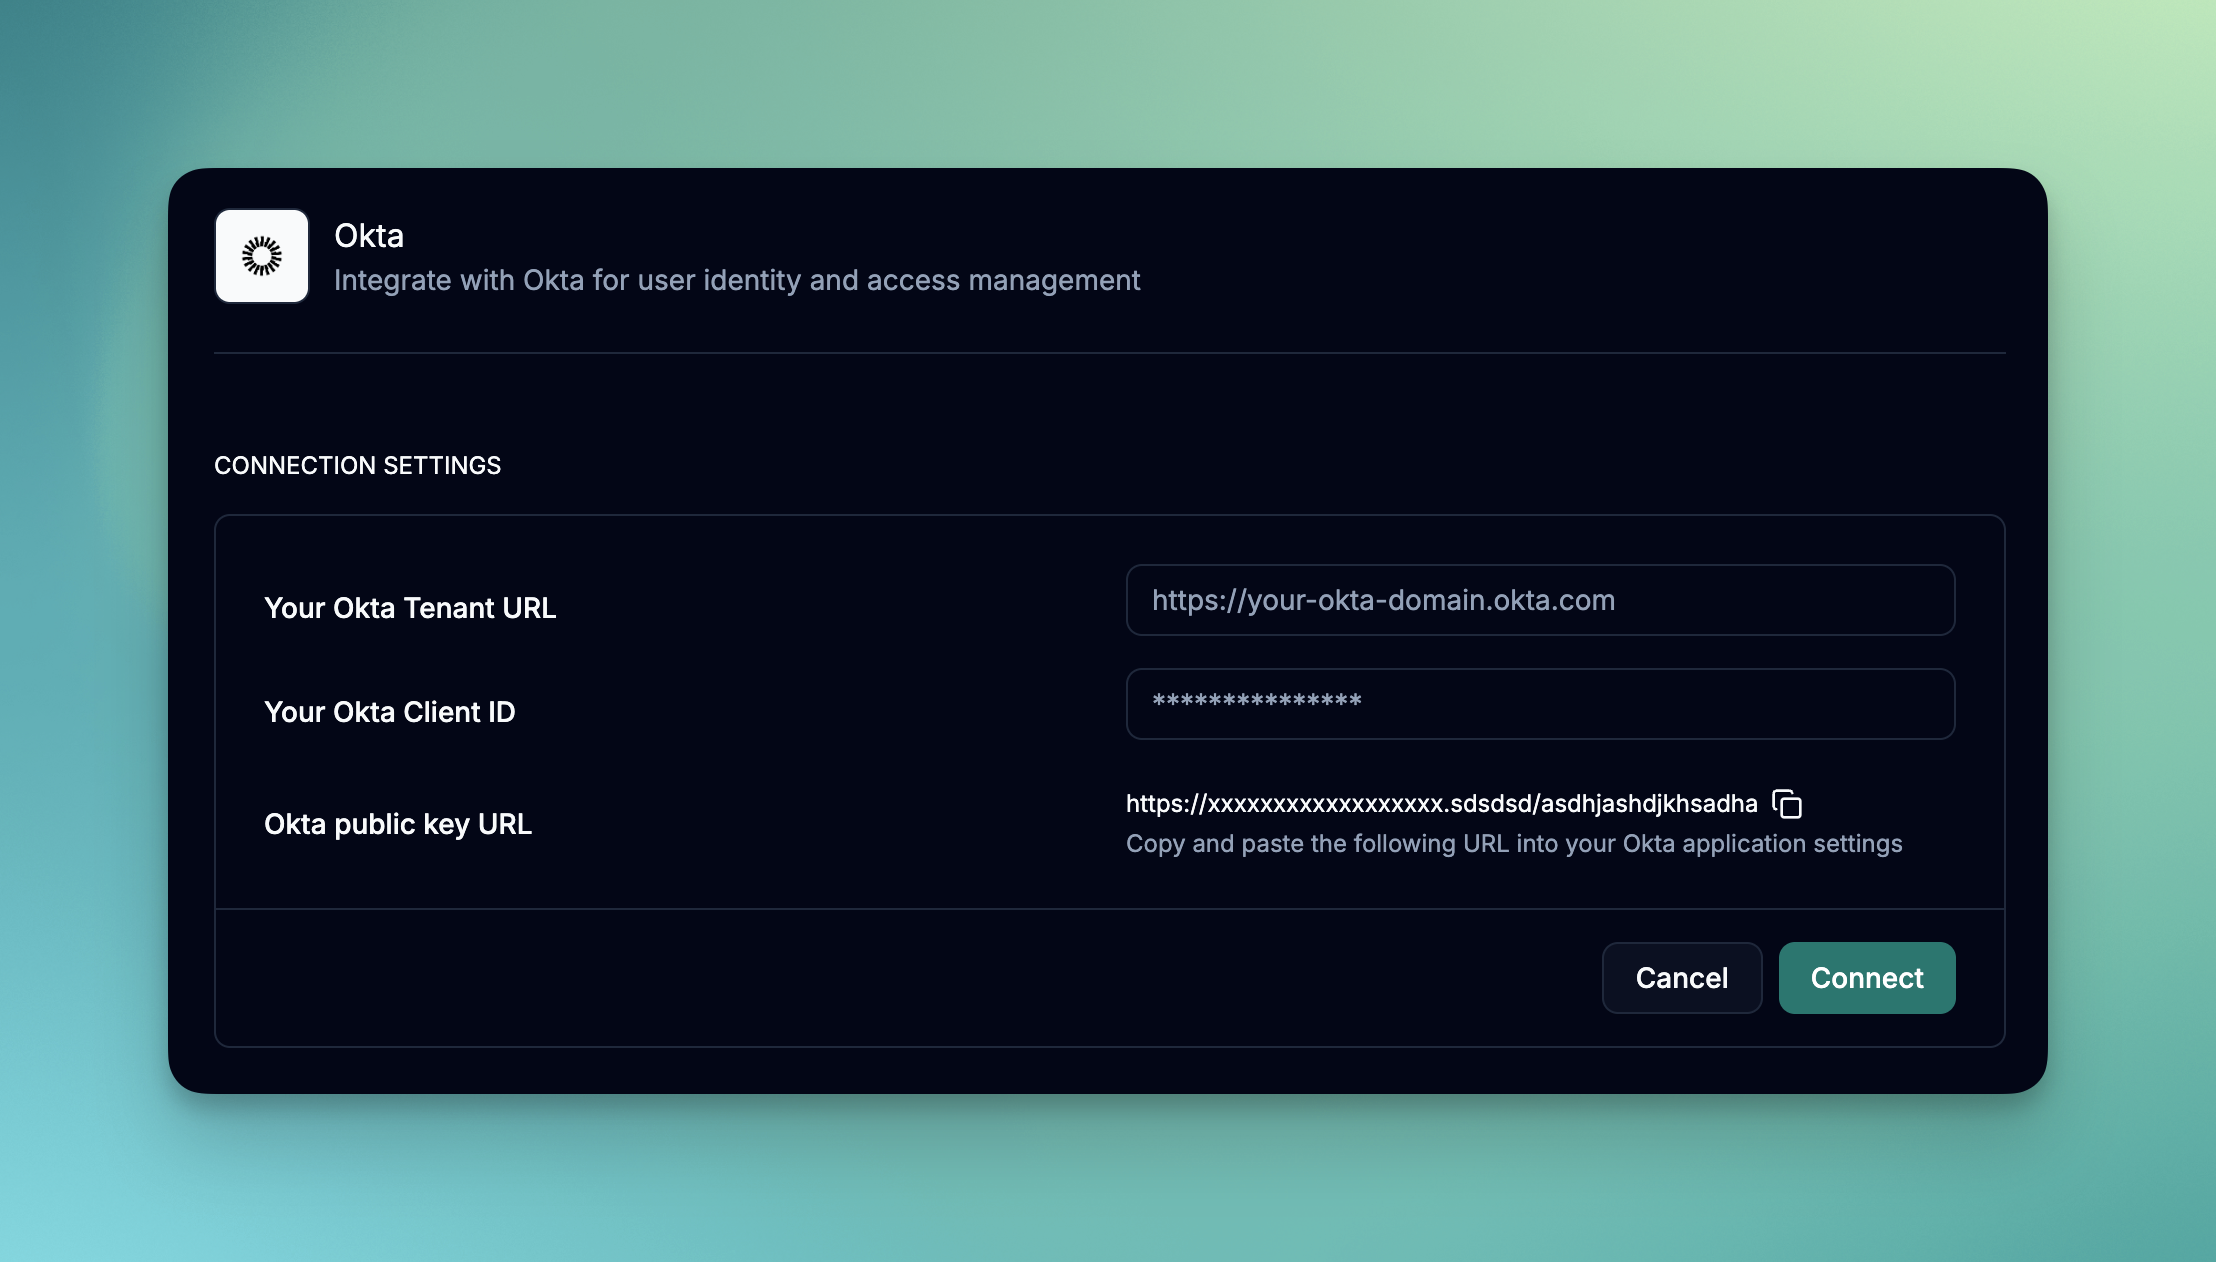
- Choose “Okta” from the available integrations
- Before you enter any details, you will need to create an Okta OAuth 2.0 application.
- Copy the Okta public key URL. You will need this for configuring client credentials using PUBLIC KEYS in Okta.
2
Access Okta Applications
- Log into your Okta admin console
- Navigate to Applications > Applications
- Click Create App Integration
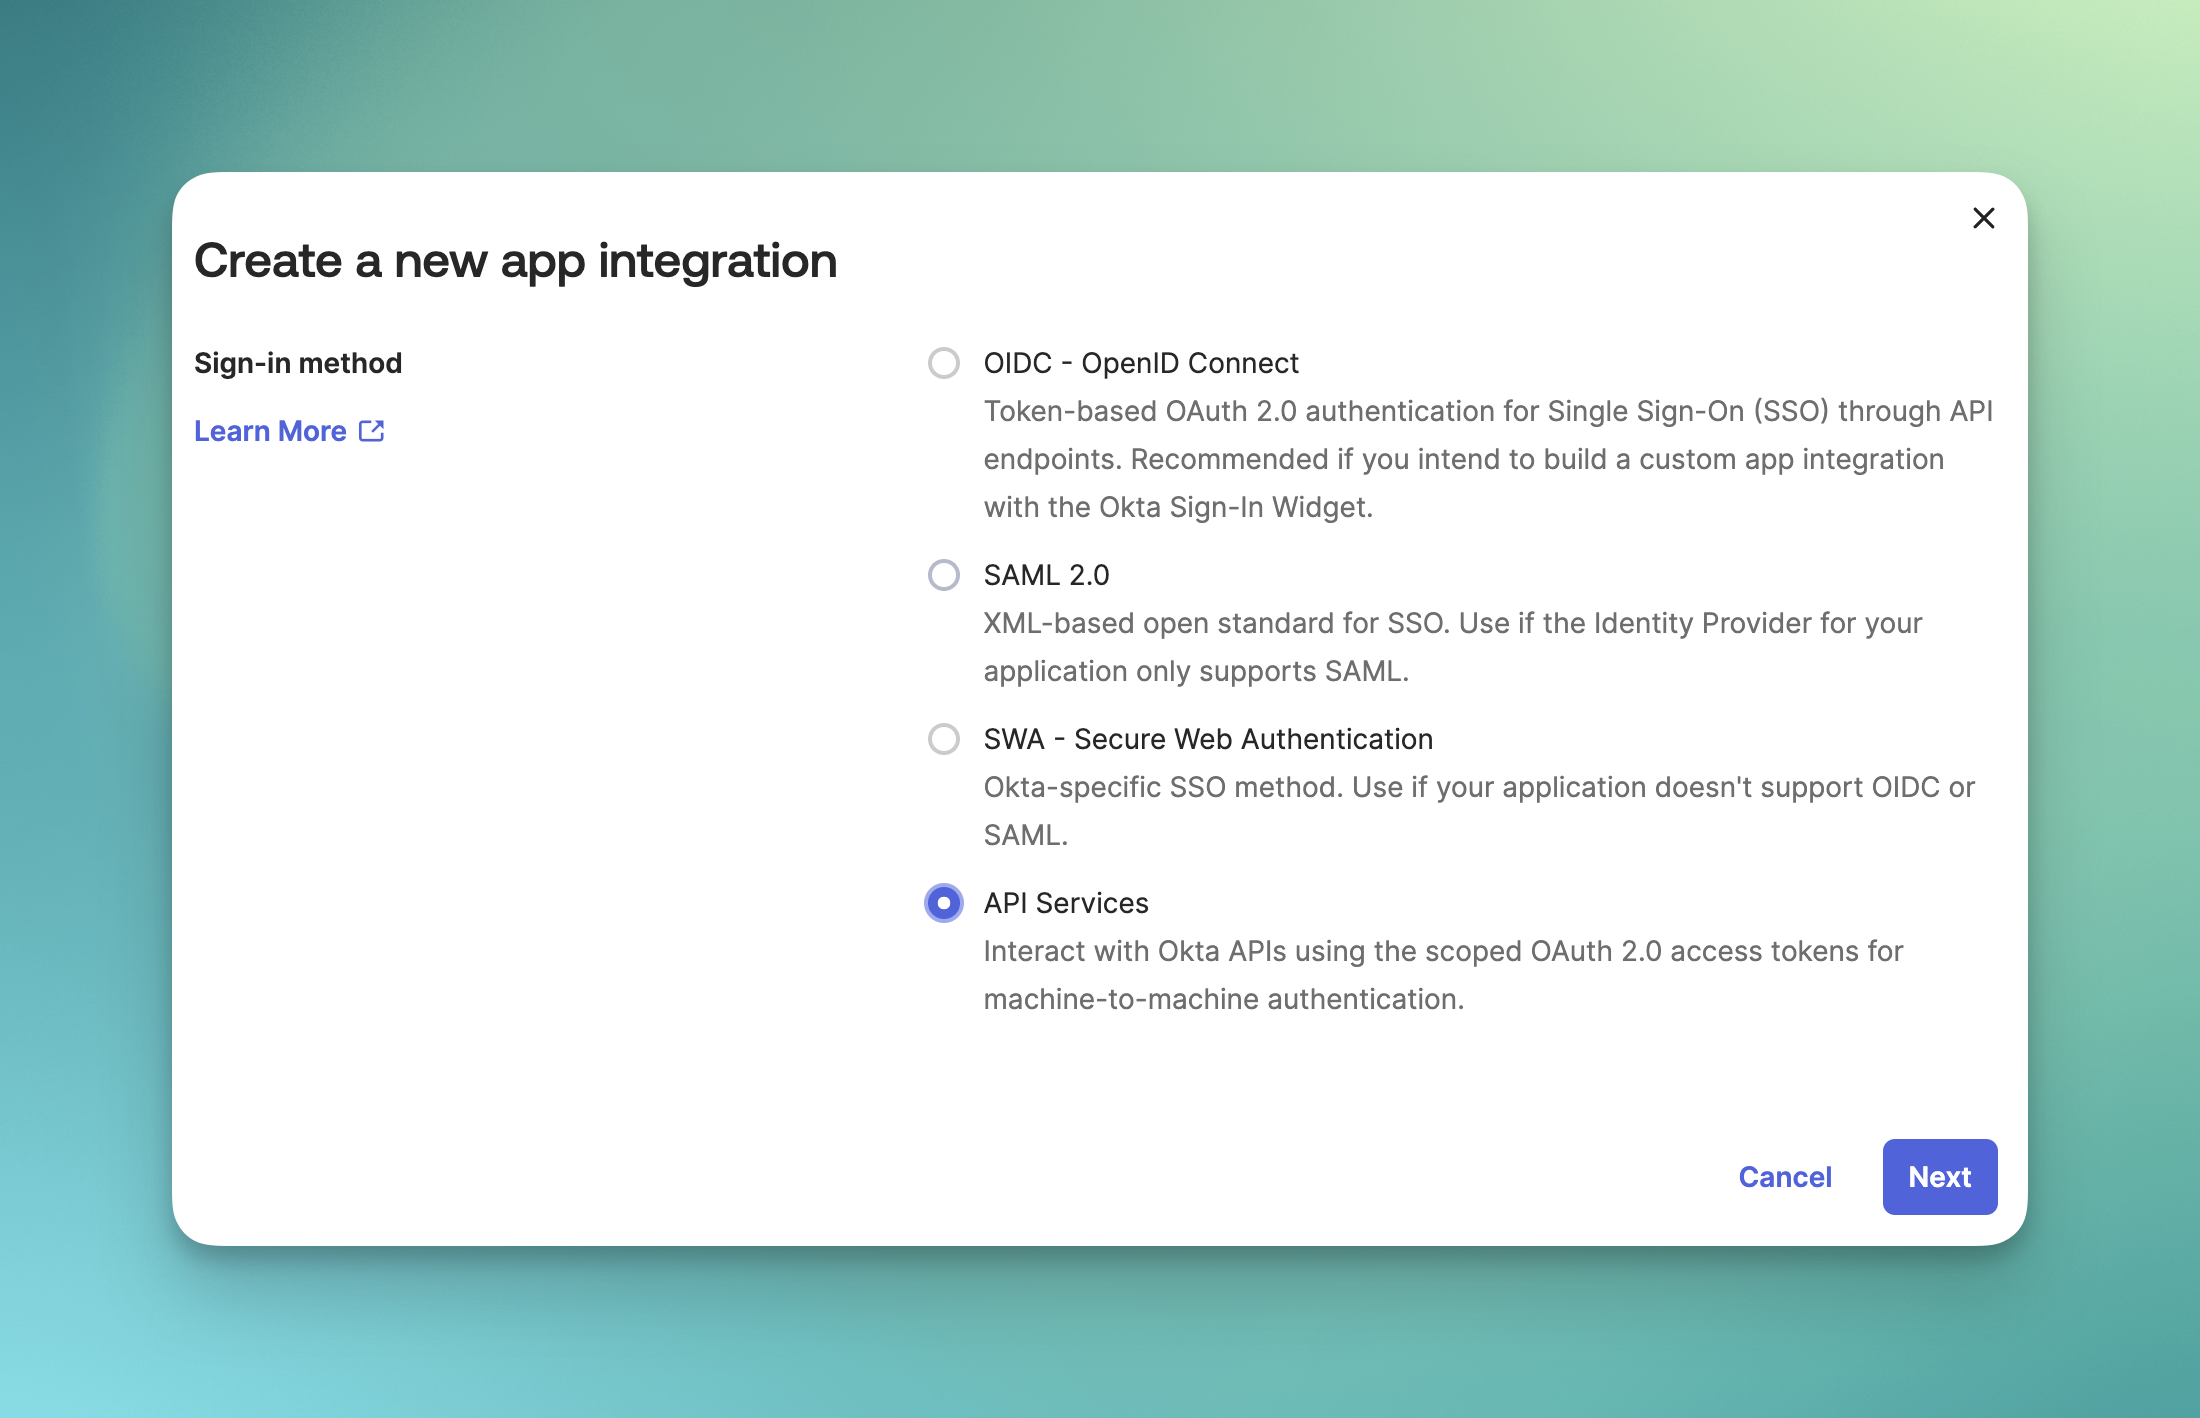
3
Choose Integration Type
- Select API Services as the sign-in method
- Click Next to continue
- Enter application name: “June API Integration”
4
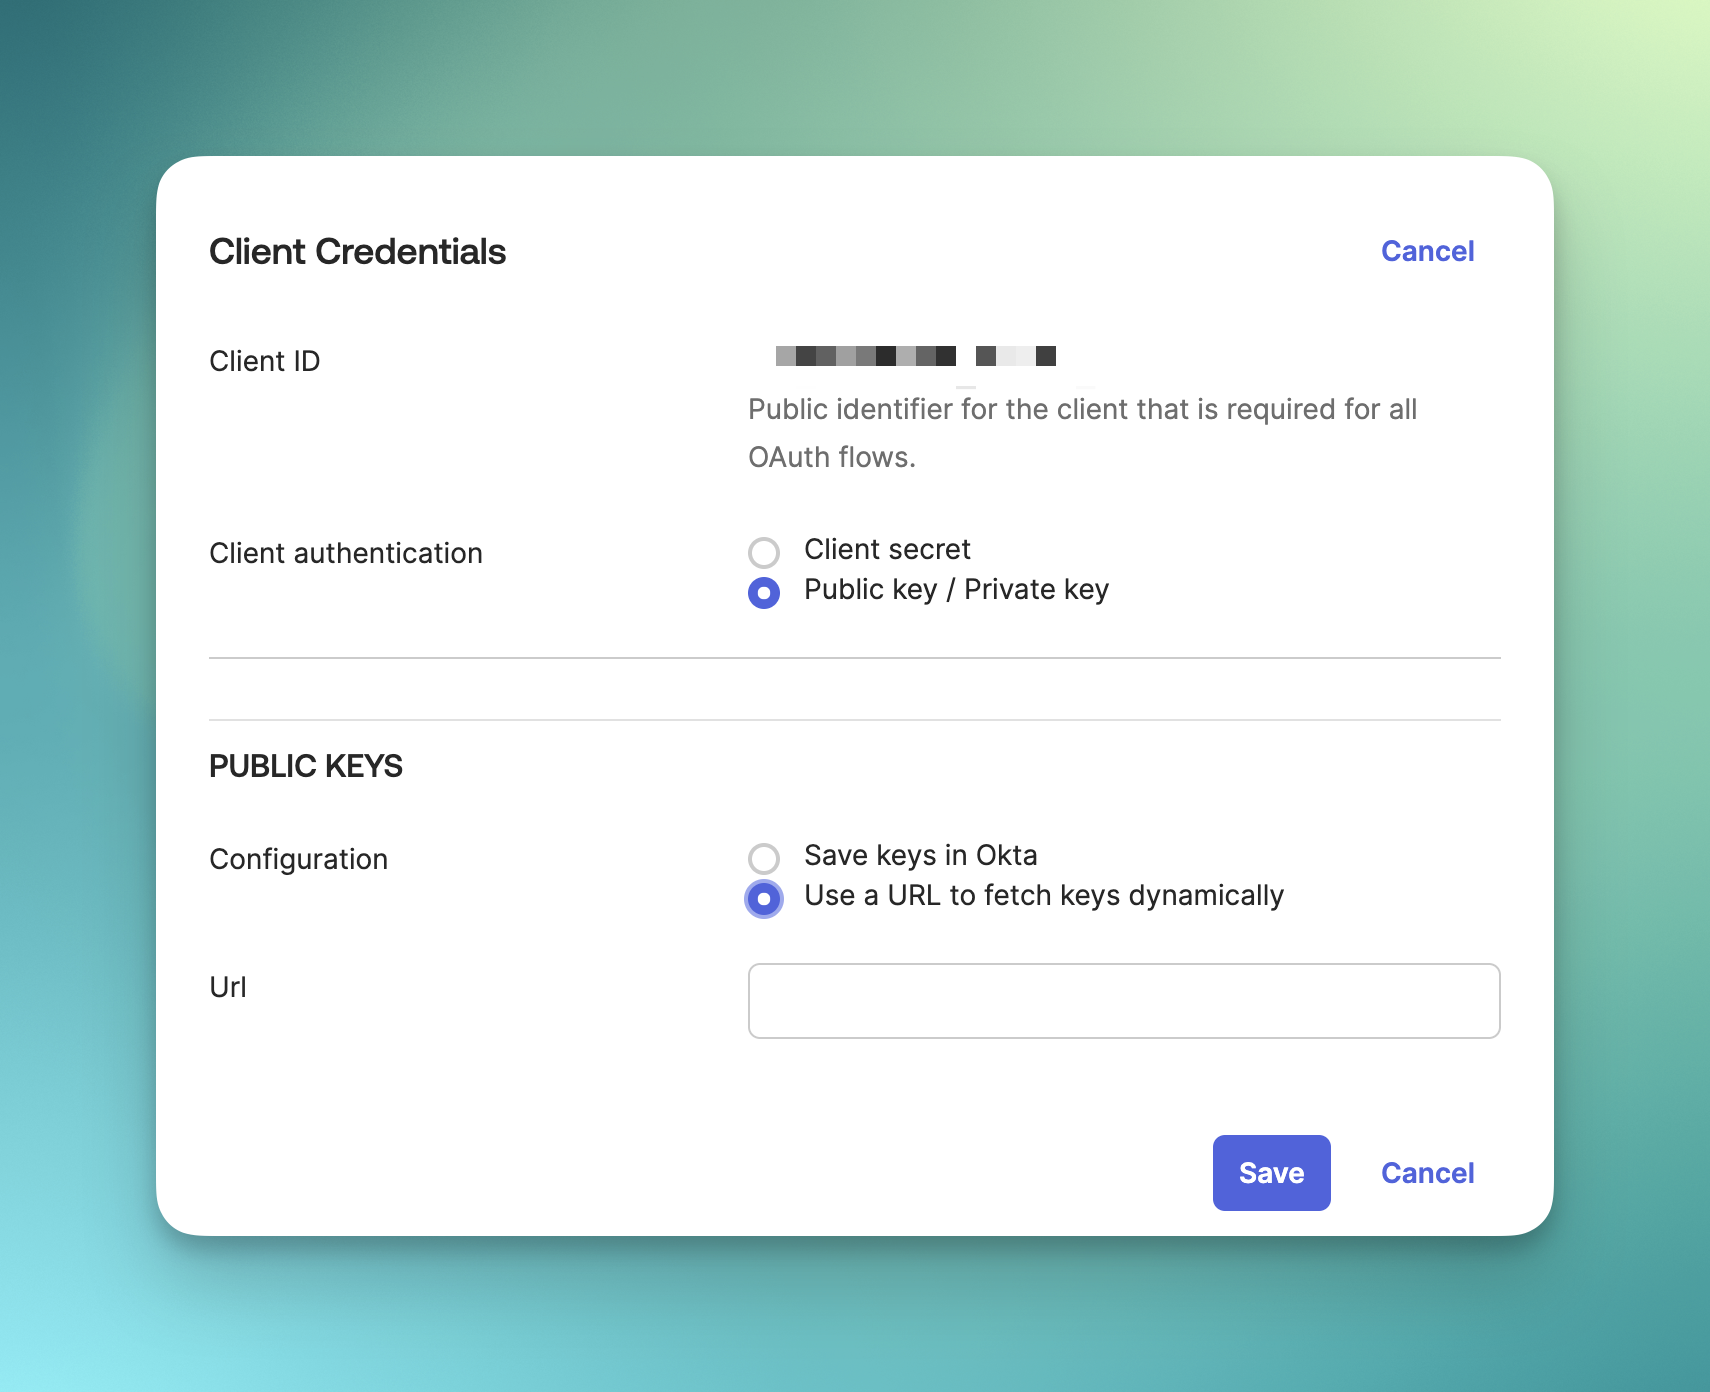
Configure Client Credentials
- Select the June API Integration application
- Go to the General tab
- Click Edit on the Client Credentials section
- Select Public key / Private key option
- Under PUBLIC KEYS, select Use a URL to fetch keys dynamically
- and add the Okta public key URL you copied earlier to the Url field.
- Click Save
5
Turn off DPoP
- Go to the General tab
- Click Edit on the General Settings section
- Uncheck the Require Demonstrating Proof of Possession (DPoP) header in token requests checkbox
- Click Save
6
Okta API Scopes
- Go to the Okta API Scopes tab
- Grant the following scopes to the application:
okta.users.readokta.groups.readokta.apps.readokta.logs.readokta.apps.manageokta.groups.manageokta.users.manage
7
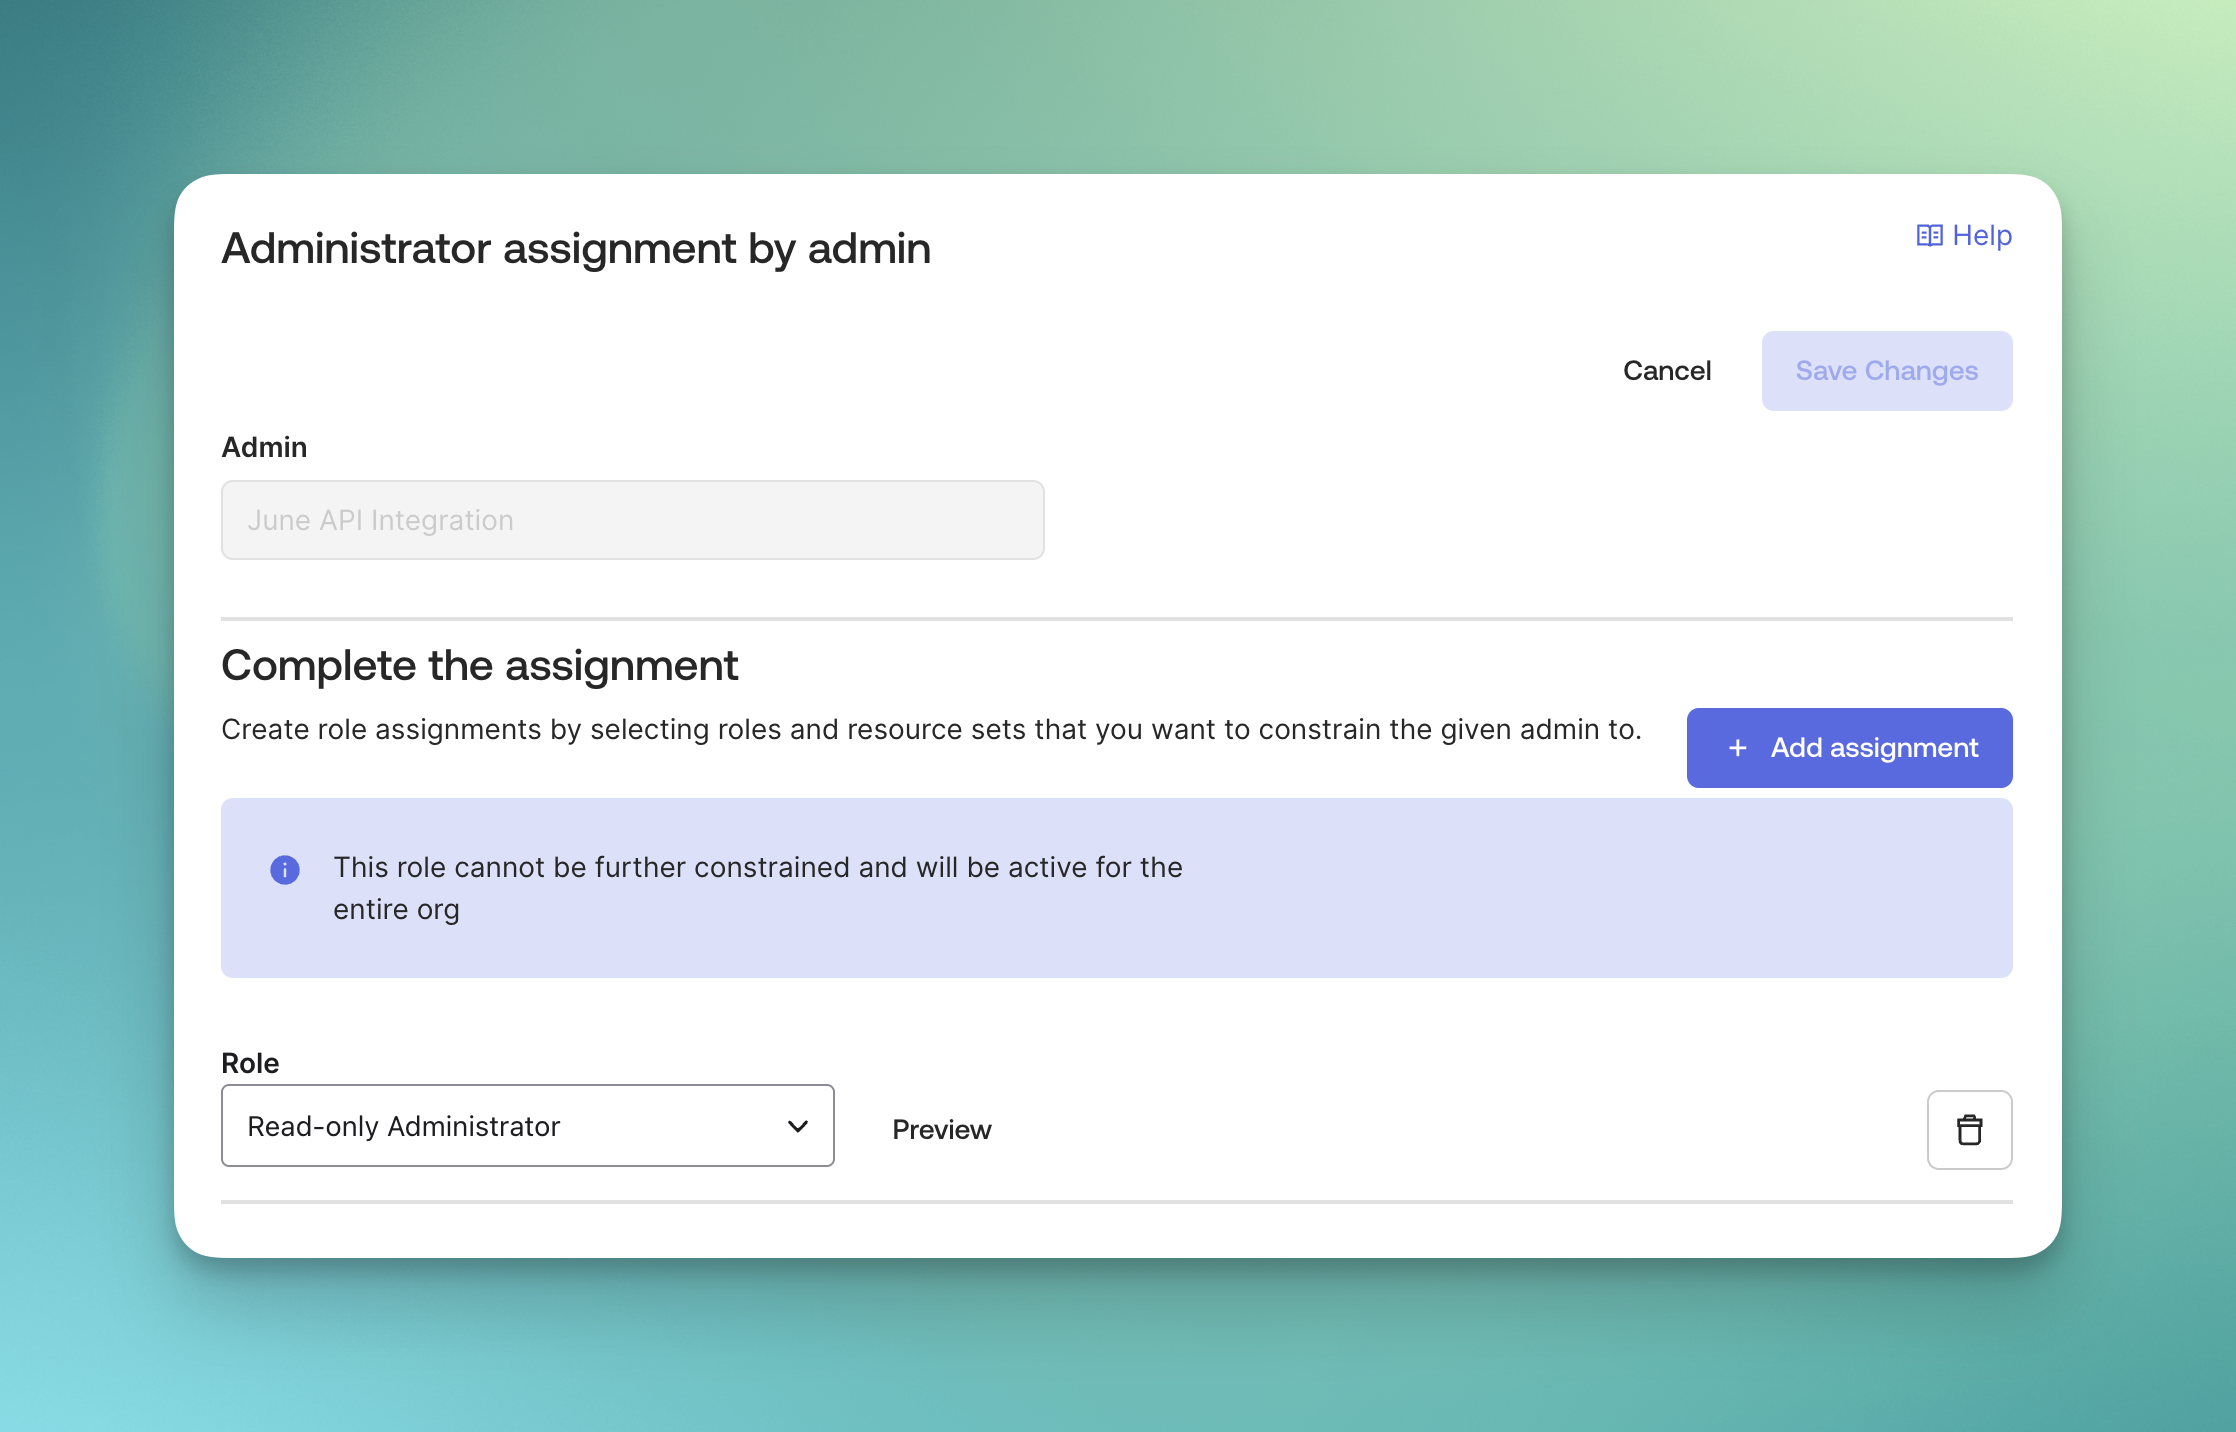
Assign Admin Roles
- Go to the Admin roles tab
- Click Edit assignments
- Select Read-only Administrator role to assign to the application
- Click Save Changes
Step 2: Set up Okta Integration in June
1
Complete Integration Setup
- Go back to June integrations page and select Okta
- Copy the Client ID from the Client Credentials section in Okta and paste it in the Client ID field
- Copy your Okta tenant URL and paste it in the Tenant URL field
- Click Save
- If the integration is successful, you should see a message saying “Integration setup complete” and the Status should be Active.
2
Test the Integration
- Click on the dropdown menu that has the status of the integration
- Click Test Integration
- If the integration is successful, you should see a message saying “Integration test successful” and the Status should be Active.
- If the integration is not successful, you should see a message saying “Integration test failed” and the Status should be Inactive.
3
Sync data from Okta
- Click on the dropdown menu that has the status of the integration
- Click Sync Now
- You should see the employees from Okta being synced to June under the Employees tab.
Support Resources
Need help with your Okta integration?- Okta Documentation: Review this article about why June needs admin roles assigned.
- June Support: Contact support for integration-specific assistance
- Community Forum: Join discussions about identity provider integrations
Syncing data from Okta to June may take up to 15 minutes based on the number of users in your Okta environment.